 Home > Articles > Delete YouTube Music History
How to Delete YouTube Music History
We all like listening to our favorite songs on YouTube Music, but what happens when your music history becomes a maze of tracks you'd rather forget? Checking your YouTube Music history allows you to revisit your favorite tunes or discover music you may have previously enjoyed. In this post, we’ll show you how to easily view and delete your YouTube Music history. It can help you keep your privacy intact, hide your musical preferences, or just organize your playlists. Now let's get started!
Part 1. How to Check YouTube Music History
Step 1 Open YouTube Music on your web browser.
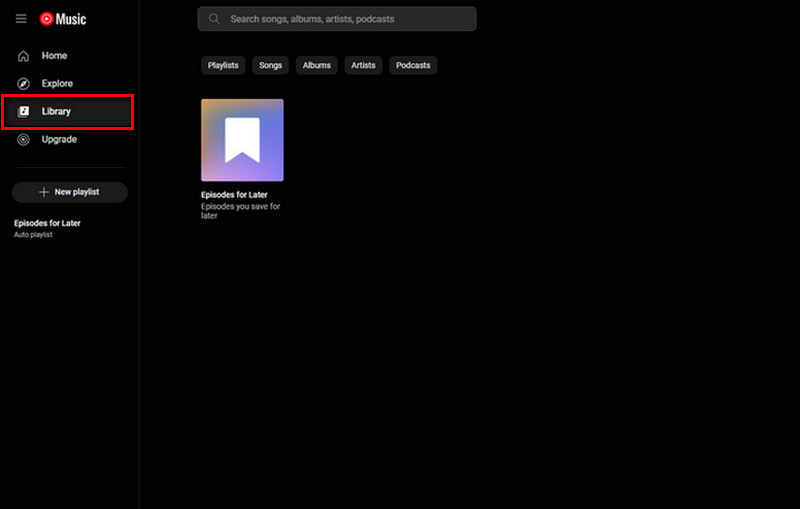
Step 2 Click on Library in the sidebar.
Step 3 Click on the history icon in the top-right corner.
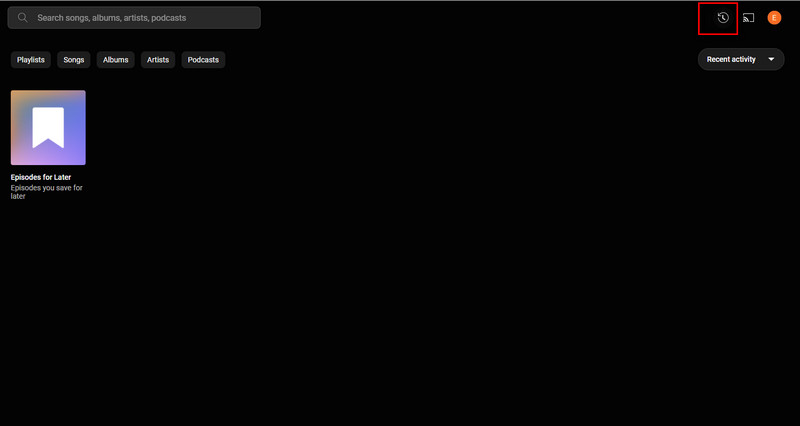
You can now view your listening history in this window. Here, you will find a list of all the songs, playlists, albums, and videos you have previously played or accessed on YouTube Music. You can scroll through the list to view your entire history, and you can also use the search bar to find specific items.
Part 2. How to Delete YouTube Music History
Now we’ve learned how to check your music history, what if you want to erase some history, do you know how to do it? There are two methods for clearing the YouTube Music History. You can delete your listening history one by one from the History page; alternatively, you can clear all listening history with one click from the Settings page. Here’s the instruction.
Delete Your Music History One by One:
Step 1 Access the History page (follow the instructions in part 1).
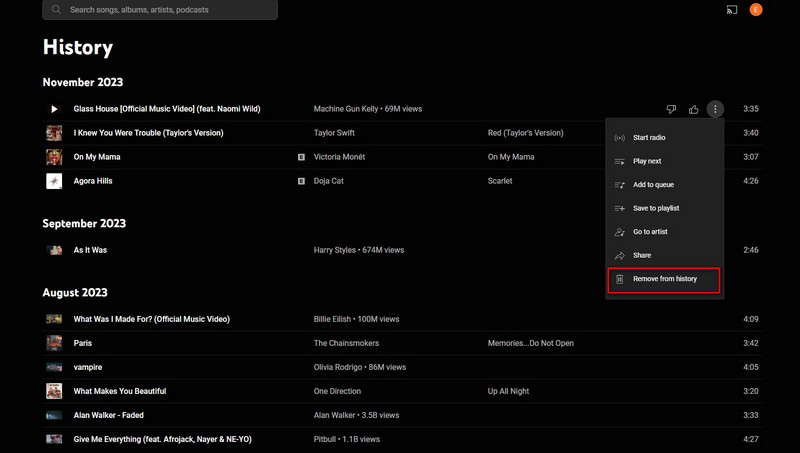
Step 2 Click the listening history you want to remove and choose the Remove from history option.
Clear All Listening History from YouTube Music:
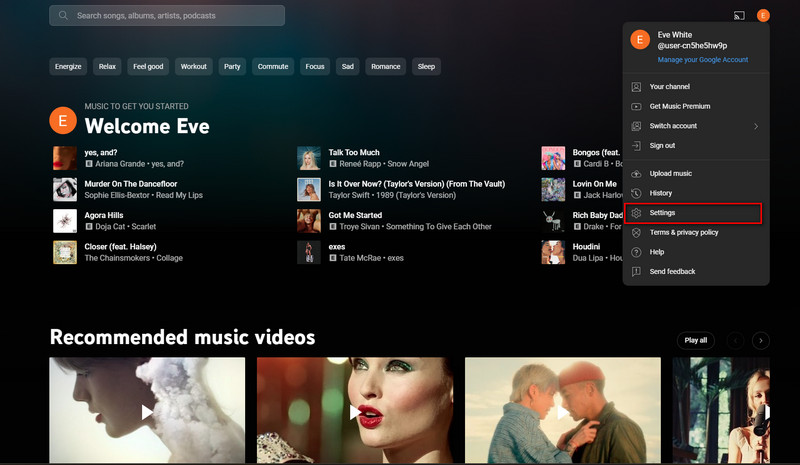
Step 1 Click your avatar and choose the Settings option.
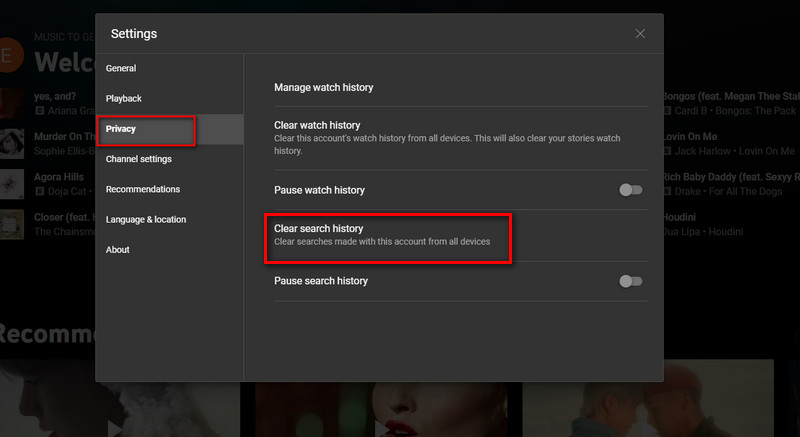
Step 2 Switch to the Privacy tab on the left side and then click the Clear watch history option on the right side.
Step 3 In the pop-up box, select the CLEAR WATCH HISTORY option located at the bottom.
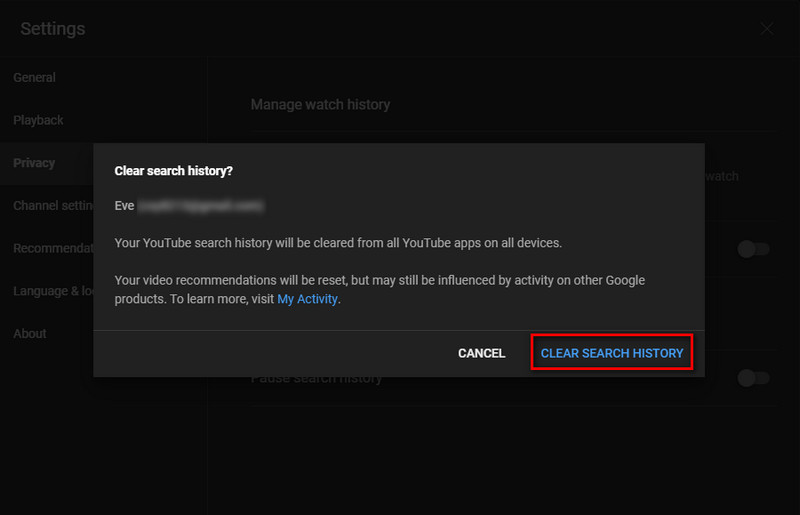
Note: This will clear your watch history from all devices and reset your video recommendations.
Part 3. How to Download YouTube Music to Your Local Device
You may think deleting listening history from YouTube Music is a little bit troublesome, you may want to get YouTube Music in MP3 formats to your phone or computer, which you can enjoy without any worry. Now we will introduce the way to download your YouTube Music as MP3 files to your device.
Here we adopt a reliable tool – KeepMusic YouTube Music Converter to achieve the goal. It’s a 100% clean & safe tool. By KeepMusic, you can download YouTube Music as .mp3 files on your computer in 5 simple steps, with no need to install any extra app.
 If you're looking to download music from various streaming platforms (such as Spotify, Apple Music, Tidal, Amazon Music, Audible, Deezer, YouTube, YouTube Music, SoundCloud, DailyMotion, and more) into MP3 files, All-In-One Music Converter is a perfect choice.
How It Works
Step 1 Open KeepMusic YouTube Music Converter
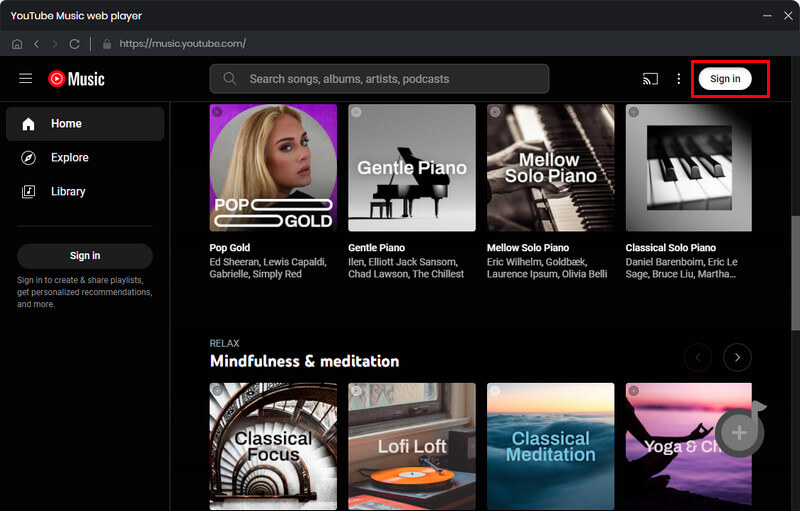
Open KeepMusic YouTube Music Converter, click SIGN IN, and log in to it with your YouTube Music account.
Step 2 Choose Output Format and Customize Output Path
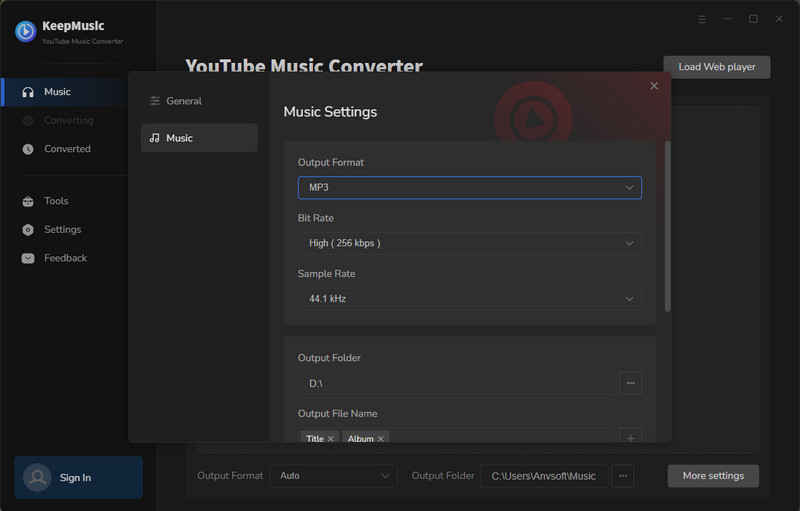
Click the Settings icon in the left side. Here you can choose the output format (MP3/AAC/WAV/FLAC/AIFF/ALAC), specify the output folder and how you’d like to name and sort out the output files, etc.
Output Format: AUTO, MP3, AAC, FLAC, WAV, AIFF, ALAC
Bit Rate: 128kbps, 192kbps, 256kbps, 320bps
Sample Rate: 44.1kHz, 48kHz, 96kHz, 192 kHz
Output Folder: C:\Users\User Name\Music\My YouTube Music (This can be modified)
Output File Name: Track Nuber/Title/Artist/Album/Playlist Index/Year Track Number
Output Organized: Playlist, Artist, Album, Artist/Album, Album/Artist, Playlist/Album, Playlist/Artist
Step 3 Add YouTube Music to KeepMusic
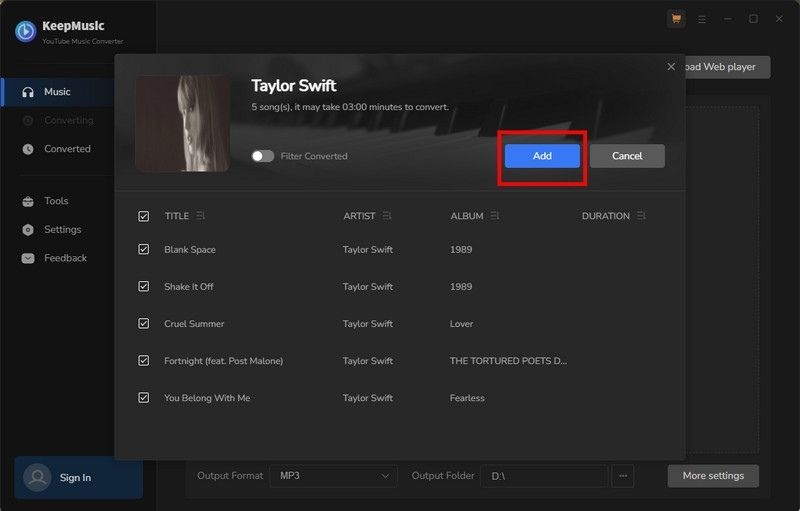
Go to a playlist, and click the floating Add button. You can then select the songs in that playlist for conversion.
Step 4 Export YouTube Music to Computer
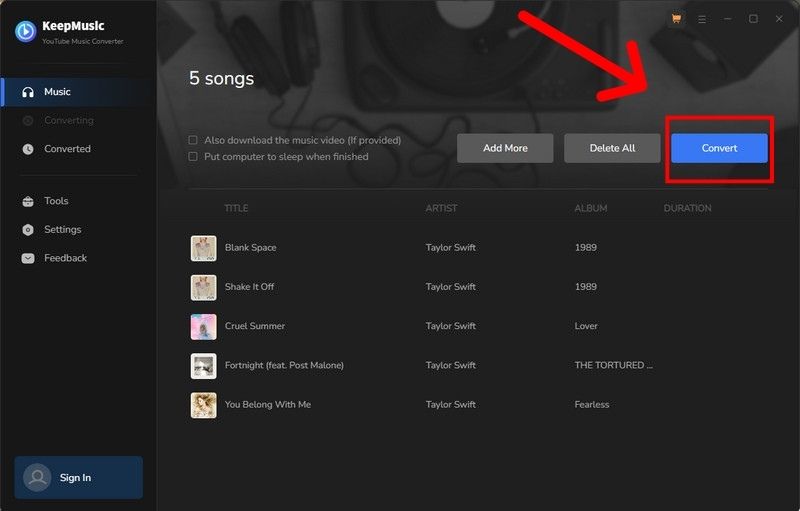
Click Convert to start exporting the YouTube Music to the specified output folder. KeepMusic supports 10X faster conversion speed. Just wait for a while till the conversion is done.
Step 5 Find YouTube Music on Local Drive.
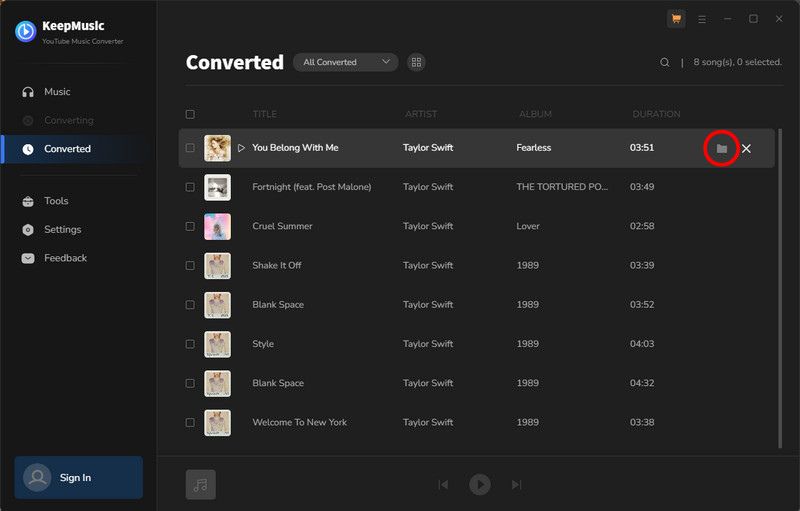
Usually, the output folder would pop up automatically once the conversion is done. If not, click Converted on the left side and you’ll find all the YouTube Music that have been converted successfully. By clicking the Folder icon of each song, you’ll be directed to the local drive that saved the YouTube Music downloads.
Final Words
In conclusion, managing your YouTube Music history is a simple process that allows you to maintain your privacy and preferences. By following the steps mentioned above, you can easily check and delete your YouTube Music history. Also, you can download your preferred YouTube Music to your local device with KeepMusic YouTube Music Converter. Then you don’t have to worry about hiding your music history anymore.


